 Have you ever considered the role your spine plays in perfecting your swing? Or pondered whether a visit to a chiropractor might enhance your performance on the green? Let’s take a deep dive into the fascinating correlation between chiropractic care and golf!
Golf, a sport often mistaken as leisurely, actually demands intense physical exertion, particularly when perfecting your swing. It's this very action – the golf swing – that may be straining your body more than you realize. This is where chiropractic care steps in, with its focus on the alignment of your spine and overall well-being, it might just be the game-changer you've been looking for. The Anatomy of a Golf Swing A golf swing is a complex, dynamic movement that involves numerous joints and muscles working in harmony. It requires coordination from your shoulders, back, hips, and knees, down to your ankles. However, a poor swing technique or repetitive swinging action can lead to various physical issues, such as muscle strains, tendonitis, and even spinal problems. From the initial backswing to the final follow-through, each phase puts a different demand on your body. Understanding these mechanics can go a long way in identifying potential problem areas and addressing them before they sideline you from the game you love. Understanding Chiropractic Care We understand that as avid golfers, you might already have a basic grasp of what chiropractic care is. But to refresh, chiropractors work with the alignment of the body, particularly the spine, to ensure it's functioning correctly. Common techniques involve spinal adjustments, massage, and stretching exercises, all part of a holistic approach to health. Chiropractic Care and Golf: The Connection So how exactly can chiropractic care help your golf game? The answer lies in the intricate relationship between your body's alignment, muscle flexibility, and joint mobility. Chiropractic care can assist in maintaining optimal flexibility and range of motion in your joints, a vital component in executing a smooth, powerful swing. When your body is in proper alignment, it's not just your swing accuracy that benefits. Your power and distance can also see a noticeable improvement. Moreover, golfers' common injuries such as back pain, golfer's elbow, or knee pain can often be traced back to suboptimal body mechanics and alignment issues. Regular chiropractic adjustments can aid in both the prevention and recovery from these injuries, keeping you active on the green for longer. The Benefits of Regular Chiropractic Care for Golfers Regular chiropractic care can offer a host of benefits to golfers. It's about more than just alleviating pain. It's about enhancing your overall performance and getting the most out of your game. Here are a few of the benefits golfers may experience:
If you're looking to enhance your performance on the green, or if you're struggling with injuries that are affecting your game, considering chiropractic care might be the game-changer you've been searching for. With regular adjustments, you may find that not only does your swing improve, but you might also notice enhanced strength, increased flexibility, better balance, and most importantly, a reduction in pain and discomfort. Remember, the most significant victories in golf aren't just about lowering your handicap or outdriving your competitors. It's about the longevity of your game, the ability to play well into later life, and enjoying the sport you love without the constant fear of injuries. So, next time you find yourself struggling with that swing, remember that the answer might not lie in a new club or a changed grip, but in the health and alignment of your spine. Consider chiropractic care as a part of your regular routine and see the difference it can make to your golf game. We're here to help you make the best out of your game. Don't let discomfort or pain keep you from performing your best on the golf course. Take a swing at chiropractic care – you might be surprised by the results!
0 Comments
 In the world of youth sports, athleticism brings numerous benefits, from physical fitness to the development of teamwork skills. However, the risk of sports injuries is an ever-present reality, with young athletes frequently facing issues ranging from minor sprains to more serious conditions like concussions. Properly managing these injuries and, more importantly, taking steps to prevent them, is crucial. Chiropractic care offers a proactive approach to not only recover from injuries but also enhance overall athletic performance and prevent future ailments. This guide explores how regular chiropractic visits can become a pivotal part of any young athlete's health regimen.
Young athletes are susceptible to a variety of injuries depending on the nature of the sport they engage in. Sprains and strains top the list, often resulting from overexertion or improper technique. Tendinitis and stress fractures also frequently occur, especially in sports that require repetitive motions. Additionally, contact sports can lead to more acute issues like concussions, which require immediate and careful attention. Understanding these common injuries is the first step toward prevention. Chiropractic care can address these issues head-on, adjusting treatment methods to suit the needs of growing bodies and ensuring a safer sports experience. The Role of Chiropractic Care in Treating Sports Injuries Chiropractic care offers more than just relief; it provides a systematic approach to treating sports injuries by focusing on the body's overall alignment and function. By employing spinal adjustments, chiropractors ensure that the central nervous system functions optimally, facilitating quicker recovery. Soft tissue therapies and rehabilitation exercises complement these adjustments, addressing the muscle imbalances and biomechanical faults that often contribute to injuries. This holistic approach not only alleviates pain but also restores function and helps young athletes return to their activities with confidence. Prevention Tips Through Chiropractic Guidance Trust us, preventing injuries is always preferable to treating them. Chiropractic care excels in this area by teaching young athletes the importance of proper body mechanics. Regular chiropractic check-ups help maintain an athlete’s body in optimal condition, identifying potential issues before they turn into serious injuries. Advice on posture and alignment is particularly beneficial in sports that involve a lot of repetitive motions, such as swimming or baseball. Additionally, chiropractors can provide specific recommendations for warm-up routines and stretches that prepare the body for physical activity, reducing the risk of muscle strains and joint injuries. Integrating Chiropractic Care into Regular Health Practices for Young Athletes Incorporating chiropractic care into the routine health practices of young athletes is not merely beneficial—it's essential for those looking to optimize their performance and ensure a long, injury-free sports career. Regular chiropractic sessions can proactively address the alignment of the spine and joints, which are often stressed in young athletes due to repetitive movements and intense physical activities. These adjustments ensure that young bodies maintain balance and symmetry, which are crucial for peak performance and injury prevention. Chiropractors can also offer tailored advice on exercises and stretches specifically suited for young athletes. This guidance helps integrate chiropractic benefits into daily life, reinforcing the effects of sessions and fostering continuous improvement in physical health. Parents and coaches should view these practices as fundamental components of athletic training, encouraging consistency and understanding their role in holistic athlete development. Encouraging Safe Sports Participation Chiropractic care plays a pivotal role in ensuring safe sports participation. By regularly assessing a young athlete’s physical condition, chiropractors can provide invaluable insights into appropriate training levels and techniques, helping to avoid overexertion, which is a common cause of sports injuries in youth. Education is key! Chiropractors often provide workshops or sessions for athletes, coaches, and parents, focusing on the importance of proper form, technique, and the recognition of injury signs. This proactive educational approach not only prevents injuries but also cultivates a culture of safety and health awareness within sports teams and clubs. Implementing regular chiropractic check-ups helps monitor the effectiveness of training programs and physical development, allowing for timely adjustments that cater to the evolving needs of growing athletes. This ongoing evaluation supports sustained athletic engagement while minimizing downtime due to injuries, which is essential for young competitors. Chiropractic care is invaluable in fostering a safe, effective, and rewarding sports experience for young athletes. It offers a proactive approach to health that goes beyond injury treatment to encompass injury prevention, performance enhancement, and optimal physical development. By making chiropractic care a staple in the health regimen of young athletes, parents and coaches can play a crucial role in nurturing their potential and safeguarding their physical well-being. Don't wait for injuries to happen! Embrace the comprehensive benefits of chiropractic care and ensure your young athletes are equipped to perform at their best. Contact us today to schedule a family appointment, and take a significant step towards enhancing the sports journey of your young champions.  Posture is the position in which you hold your body while sitting, standing, or performing physical activities. It may not seem like a big deal, but posture has a significant impact on daily life and overall health. Good posture not only makes you look more confident and self-assured, but it also has numerous physical and mental health benefits. Chiropractic care is a natural and effective way to improve posture and maintain good spinal health.
The Negative Consequences of Poor Posture Poor posture can lead to a host of physical and psychological problems. Physically, poor posture can cause back pain, headaches, joint problems, and even lead to chronic conditions. Mentally, poor posture can affect confidence and self-esteem. When you slouch or hunch over, it sends a message to others that you're not confident or self-assured. This can impact your relationships and overall quality of life. The Benefits of Good Posture On the other hand, good posture has numerous physical and mental health benefits. Physically, good posture reduces the stress placed on your joints, muscles, and spine. This can lead to less pain and discomfort, and improved athletic performance, including increased flexibility and coordination. Mentally, good posture can increase confidence and self-esteem, which can improve relationships and overall quality of life. How Chiropractic Can Help Improve Posture Chiropractic care is a natural and effective way to improve posture. Chiropractors use a variety of techniques, including spinal adjustments and exercises, to help improve posture and prevent problems from developing. Regular chiropractic visits can help keep your spine healthy, prevent posture problems from developing, and ensure that your body is aligned and functioning optimally. There are several common posture problems, including forward head posture, rounded shoulders, and slouching. These problems can be addressed and improved with chiropractic care. Chiropractors use a variety of techniques, including spinal adjustments and exercises, to help improve posture and prevent problems from developing. Taking Control of Your Posture Improving posture is not only about visiting a chiropractor; it's also about taking control of your daily habits. By being mindful and self-aware of your posture, you can make small changes in your daily habits that will lead to improved posture and overall health. Some simple tips and suggestions for maintaining good posture include sitting up straight, engaging your core, and avoiding prolonged periods of sitting or standing. Posture is an essential aspect of overall health and well-being. Good posture has numerous physical and mental health benefits, while poor posture can lead to a host of problems. Chiropractic care is a natural and effective way to improve posture and maintain good spinal health. By taking control of your posture and seeking chiropractic care, you can improve your overall health and quality of life.  When we think about keeping our families healthy, we often focus on diet, exercise, and regular check-ups with our doctors. But there's another key piece to the wellness puzzle that can make a big difference for everyone in your family – chiropractic care. It's a natural way to help your body work its best, from babies just a few months old to great-grandparents.
Chiropractic care is all about helping your body heal itself. It's not just about cracking backs or relieving pain; it’s a way to make sure your body’s structure and your nervous system work together smoothly. When everything is aligned and moving correctly, your body can do a better job of taking care of itself. For the Little Ones: Infants and Children You might wonder why babies or kids would need chiropractic care. It turns out, even the process of being born can put a lot of stress on a baby's body. Gentle chiropractic adjustments can help make sure they start life with everything in the right place. For older kids, chiropractic care can help with common issues like ear infections, colic, and even some problems with sleeping. It's all about making sure their bodies are balanced and functioning well as they grow. Growing Up: Teenagers and Young Adults Teen years come with their own set of challenges – think heavy backpacks, lots of screen time, and sports injuries. Chiropractic care can help manage these by improving posture, reducing the risk of injuries from sports, and even helping with concentration and stress. It’s about giving young people the best start on a healthy, active life. Staying Strong: Adults For adults, life's daily stresses – like sitting at a desk all day, juggling family responsibilities, or finding time for exercise – can take a toll on our bodies. Regular chiropractic visits can help manage stress, relieve pain, and keep you feeling your best. It’s a way to ensure you have the energy and health to enjoy life and take care of your family. Active Golden Years: Seniors As we age, staying active and maintaining independence becomes more important. Chiropractic care can be a key ally for seniors, helping to improve balance, mobility, and overall quality of life. It's not just about reducing aches and pains; it’s about enhancing strength and flexibility so seniors can enjoy their favorite activities and maintain their daily routines safely and comfortably. Regular chiropractic adjustments can also help manage chronic conditions, like arthritis, by keeping joints moving smoothly. Bringing Chiropractic Care into Your Family’s Routine Integrating chiropractic care into your family’s health routine doesn’t have to be complicated. Start with a visit to a family chiropractor who is experienced in treating patients of all ages. These visits can be a time for each family member to get the care they need, tailored to their specific stage of life and health concerns. Here are a few tips to make chiropractic care a regular part of your family's wellness plan:
So, why wait to give your family the benefits of chiropractic care? Contact us today to schedule a family appointment. Let's work together to keep your family active, healthy, and thriving through every season of life.  As a chiropractic patient, you already know the importance of regular chiropractic care for maintaining a healthy spine and nervous system. But what you may not realize is that the time between your chiropractic visits is just as crucial for your overall health and wellness. Regular stretching can help keep your muscles flexible, reduce discomfort and improve your posture.
Here are 10 stretches that you can do at home to help keep your body in top form between chiropractic visits:
The Athlete's Guide to Preventative Chiropractic Care: Enhancing Performance and Longevity3/17/2024  As athletes continually push their bodies to the limits, the quest for peak performance is perpetually balanced against the risk of injury. Enter the realm of preventative chiropractic care, a proactive approach designed not just for injury recovery but for its prevention, performance enhancement, and the longevity of sports careers. This specialized care focuses on maintaining optimal spinal alignment and muscle function, which are foundational for athletic prowess. In this guide, we delve into the multifaceted benefits of incorporating regular chiropractic visits into an athlete's regimen. Our goal is to shed light on how these consultations can serve as a cornerstone for injury prevention, significantly boost athletic performance, and help athletes enjoy longer, more fulfilling careers. Join us as we explore the compelling reasons why preventative chiropractic care should be an integral part of every athlete's training strategy.
Understanding Preventative Chiropractic Care Preventative chiropractic care stands as a beacon for athletes seeking not just to heal but to excel and endure in their sports. It’s a strategic approach that prioritizes the maintenance of optimal health through regular spinal adjustments, soft tissue therapy, and mobility exercises, aiming to prevent injuries before they occur. This form of care is about being proactive rather than reactive; it's the difference between regular maintenance to prevent breakdowns and seeking repairs after the fact. While reactive chiropractic treatment addresses specific injuries and ailments as they arise, preventative care focuses on regular, ongoing adjustments and therapies to maintain peak physical condition. This forward-thinking approach ensures that athletes can consistently perform at their best, with a reduced risk of injury disrupting their training or competitive schedule, embodying a true commitment to longevity and sustained athletic excellence. The Role of Chiropractic Care in Injury Prevention In the athletic arena, injuries such as sprains, strains, and joint issues are all too common, often resulting from the intense and repetitive physical demands placed on an athlete’s body. Misalignments or biomechanical imbalances, though seemingly minor, can significantly exacerbate the risk of these injuries. For instance, a misaligned spine can lead to uneven distribution of force during physical activity, putting undue stress on one part of the body and predisposing it to injury. Regular chiropractic adjustments play a pivotal role in identifying and correcting these imbalances well before they culminate in injury. By ensuring that the body’s musculoskeletal system is properly aligned, chiropractic care helps maintain an optimal state of physical function, significantly reducing the risk of injury. This proactive approach to wellness enables athletes to continue their training and competition schedules uninterrupted by preventable injuries. A notable example of chiropractic care’s efficacy in injury prevention comes from the world of running, where overuse injuries like shin splints and iliotibial band syndrome are prevalent. Through regular chiropractic adjustments, runners can maintain proper pelvic balance, which is crucial for the symmetrical movement of legs and can help in avoiding these common injuries. Similarly, chiropractors often assist football players in maintaining spinal alignment and flexibility, reducing their risk of injuries from hard impacts and tackles. These cases underscore the integral role of chiropractic care in not only treating but more importantly, preventing sports-related injuries. Enhancing Athletic Performance Through Chiropractic Care Chiropractic care significantly transcends the realm of injury prevention, directly influencing and amplifying athletic performance. At its core, the practice enhances joint mobility and flexibility, crucial attributes for any athlete. A body liberated from spinal misalignments presents a fuller range of motion, enabling more efficient, stronger movements. This heightened musculoskeletal functionality directly translates into performance enhancements across various sports, from a sprinter achieving faster starts to a swimmer executing smoother turns. Furthermore, the benefits of chiropractic care extend to the nervous system, the command center for the body's coordination and reaction capabilities. Chiropractic adjustments help minimize nerve interference, which is vital for maintaining peak coordination and reaction times. For athletes, where milliseconds can determine the outcome of a competition, the importance of such care cannot be overstated. Athletes from diverse sports disciplines, including those at the pinnacle of their careers, frequently share their positive experiences with chiropractic care. Many recount how regular sessions have led to noticeable improvements in their performance, citing increased strength, enhanced agility, and better endurance. These testimonials from high-performing individuals not only highlight the tangible benefits of chiropractic interventions but also underscore its value as a cornerstone of any serious athlete’s training regime. By prioritizing spinal health and nervous system function, chiropractic care provides athletes with the tools they need to reach and maintain their performance peak. Extending Sports Careers with Preventative Care Preventative chiropractic care is pivotal in ensuring athletes not only reach their peak performance but also enjoy prolonged careers in sports. By maintaining optimal physical health and mitigating the wear and tear associated with rigorous training and competition, chiropractic care helps athletes stay in the game longer. Regular adjustments ensure the musculoskeletal system is balanced and functioning efficiently, which reduces the risk of overuse injuries that can sideline athletes or even cut their careers short. A holistic approach to athlete care is fundamental for longevity in any sport. This means looking beyond just physical training to include nutritional counseling and lifestyle adjustments that support overall well-being. Chiropractors play a crucial role in this holistic strategy, offering advice on diet and recovery practices that complement physical adjustments. Such comprehensive care ensures that the body's recovery processes are optimized, and nutritional needs are met, contributing to better performance and durability. Incorporating chiropractic care into an athlete’s regular training and recovery routines offers tangible benefits. It not only helps in fine-tuning their body’s mechanics but also enhances the body’s natural healing processes, ensuring quicker recovery from injuries and fatigue. This continual care allows athletes to train more effectively and with greater consistency, attributes that are key to a successful and long sporting career. Athletes who prioritize this integrated approach to health and performance find that they can compete at their best for years longer than might otherwise be possible, truly maximizing their potential and longevity in their chosen sports. Getting Started with Preventative Chiropractic Care For athletes ready to incorporate chiropractic care into their wellness routines, beginning the journey is straightforward but requires thoughtful consideration. Start by seeking a chiropractor with experience in sports medicine or one who specializes in athletic performance. Their understanding of sports-related injuries and performance optimization will be crucial. Look for providers who actively engage in continuing education within sports chiropractic fields and those who come highly recommended by other athletes. When you meet with a potential chiropractic provider, be clear and specific about your sports-related health goals and any previous injuries you've experienced. Communication is key to effective care. Discuss your training schedule, the physical demands of your sport, and how you currently address recovery. A skilled chiropractor will use this information to tailor a preventative care plan that aligns with your objectives, optimizing your health and enhancing your athletic performance. This proactive step can be a game-changer in achieving longevity and success in your sporting endeavors. By maintaining optimal physical health through regular chiropractic visits, athletes can push their limits with confidence, knowing they're taking proactive steps to safeguard their careers. We encourage athletes and their families to view regular chiropractic care as a crucial component of a holistic health and wellness strategy. Ready to elevate your game and extend your sports career with preventative chiropractic care? Contact us to schedule your chiropractic appointment today and take the first step towards optimized health and performance. In the dawn of 2024, KC Chiro is buzzing with anticipation as we embark on an exciting journey filled with new developments (stay tuned for more!). To kick off this era of growth, we're thrilled to announce the expansion of our family through the addition of new members to our ownership group, as well as the inclusion of fresh faces among our providers and staff.
A significant milestone that marks the beginning of this transformative period is the effective merger of Finan Chiropractic with KC Chiro, starting from January 1, 2024. Finan Chiropractic has long been a cherished member of our community, and the prospect of blending our teams has us brimming with enthusiasm. The proud owner of Finan Chiropractic, Dr. Therese Finan, has not only become an integral part of the ownership of KC Chiro but also brings with her an impressive background of over a decade in both clinical expertise and business acumen. Dr. Finan is not alone in this exciting venture; she is accompanied by four other highly skilled Chiropractors, each contributing their unique and valuable expertise to our collective journey. Furthermore, Dr. Finan's dedicated team of office staff, who have played a crucial role in the success of her previous practice, now stand ready to become a valuable asset to the broader KC Chiro family. This merger is not just a corporate move; it's a significant leap forward that holds tremendous benefits for our current and future patients. With our ever-growing team, KC Chiro is now positioned to offer enhanced availability and increased access to exceptional chiropractic care. The collective knowledge and skills of our expanded team mean that we can continue to provide the highest standard of care, ensuring that our patients receive the personalized attention and effective treatments they deserve. As we embrace these new beginnings, we remain committed to our core values of patient-centric care, innovation, and community engagement. The integration of Finan Chiropractic into the KC Chiro family is not just a merger on paper; it's a union that reflects our shared commitment to fostering health and wellness within our community. We extend our heartfelt gratitude to our patients, both longstanding and new, for entrusting us with your well-being. We look forward to serving you with even greater dedication and resources as we continue this exciting chapter in the KC Chiro story. Stay tuned for more updates as we unveil additional surprises that will further elevate your chiropractic experience with us. Here's to a year filled with growth, collaboration, and optimal health for all! Thank you for being part of the KC Chiro family.  As baseball tournament season arrives, it's crucial to address one of the common injuries seen in clinics: Little Leaguer's elbow. This overuse injury primarily affects the medial side of the elbow, posing greater concerns for skeletally immature athletes due to the presence of growth plates. Disruption of these growth plates can lead to long-term effects, potentially requiring extended recovery periods or even surgery.
Contrary to anecdotal beliefs, research indicates that different pitch types do not significantly impact the risk of Little Leaguer's elbow. Rather, the primary contributing factors are the pitch count, number of pitches thrown in a single outing, time between outings, and pitching mechanics. The quantity of pitches thrown is more influential than the specific types of pitches used. Effective load management strategies are vital in preventing this injury. Pitch counts play a crucial role, with studies showing that exceeding 600 pitches in a season more than doubles the injury rate. Most recommended pitch counts fall within the range of 500-600 pitches per season. Additional load management techniques include avoiding participation in multiple teams, having dedicated off-season periods without throwing, and assuming non-throwing-intensive positions on days when not pitching (e.g., playing catcher or first base). Addressing body mechanics is another essential aspect of prevention. While upper extremity mechanics are commonly assessed in throwing athletes, lower extremity mechanics are often overlooked. Evaluating how the lower extremities contribute to upper extremity function is crucial. When athletes seek clinical assessment, a comprehensive evaluation is performed, encompassing the ankle, up to the shoulder complex, and even neck range of motion. Distinguishing between proper body mechanics and athletic mechanics is essential, as they can significantly differ. By understanding the causes and preventive measures for Little Leaguer's elbow, athletes, coaches, and parents can take proactive steps to minimize the risk of this overuse injury, allowing young baseball players to enjoy the game safely and sustainably.  Marathon season is in full swing, which means the aches and pains may be adding up for you! One of the most common injuries we see in runners of all distances is “shin splints” or medial tibial stress syndrome. Shin splints affect the muscles and tissues on the front of the leg, and is believed to result from repetitive contraction of those muscles during running, jumping, or other high impact activities. These repetitive contractions on the leg can result in myofascial strain, inflammation, and bony stress reaction which lead to pain. In this month’s blog, we are going to cover ways you can help prevent shin splints at home as well as what to do if you are dealing with them now!
When dealing with shin splints, one place we like to start is with some foam rolling. Foam rolling your leg can help to reduce pain and the feeling of “tightness” that can come with lots of running. When dealing with shin splints, rolling both your calves and your shins themselves is most beneficial! To roll your calves, begin in a long-sitting position on the floor with a foam roller under your affected calf. Use your arms to elevate your upper body while applying pressure to your calf on the foam roller. Slowly rock forward and backward over tender spots with varying degrees of inward and outward position of your foot to work all areas. If you find a tender spot, maintain steady pressure on that area while you slowly flex and extend your ankle several times. This same process can be repeated for the shin, but using your arms to hold yourself over the foam roller and placing your shin on the roller. Repeat for both legs. After foam rolling the leg, we like to move on to some stretches. There are a variety of ways to stretch the calf muscles, but stretching the shin muscles can be a little trickier! To start, sit in a chair and place the top of your involved foot on the floor. Roll your foot so that more of your great toe side is touching the ground. Slowly move forward in your chair pushing down on your foot until a stretch is felt. Repeat for both legs. Now that you have foam rolled and stretched your leg, we want to take some time to strengthen the leg. To address the shin splints themselves we want to focus on the shin muscles themselves. One way to do this is by sitting with your involved leg crossed over your uninvolved leg. Loop a piece of resistance tubing over your forefoot and secure it beneath your foot on the floor, then stabilize your lower leg with one hand. Against the resistance of the elastic, roll your involved foot upward, as though you are attempting to look at the bottom of your foot. Repeat for both legs. If this at home care program does not fix your symptoms, then we recommend getting on our schedule! A thorough evaluation could provide more information about your situation. We have multiple forms of treatment that can be used to address shin splints, including instrument assisted soft tissue mobilization, dry needling, and NormaTec compression boots. If our treatments in office do not provide relief, it is possible that the bony stress reaction has developed into a stress fracture. In situations where stress fractures are suspected, x-ray imaging is ordered to confirm, and our care plan is catered to promote proper healing. If you or someone you know is experiencing shin splint-type symptoms, schedule a visit today! 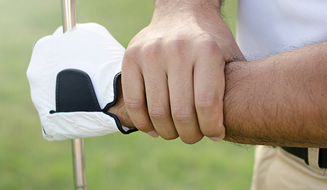 Golfing through wrist pain is a huge mistake! Whenever we hear any golfer mention pain in their wrist, we start to worry. Wrist injuries have the potential to be career ending if not taken seriously and not treated properly. When it comes to wrist injuries, we have our usual suspects of the sprains and strain. These are usually caused by hitting a shot flat, tree root, or something along those lines. There are also some “unusual” suspects that we run into with golfers. The one we want to talk about today is triangular fibrocartilage complex (TFCC) tears. The TFCC is a complex group of ligaments and cartilaginous structures which stabilize the distal radioulnar joint, particularly during pronation (palms to the ground) and supination (palms to the sky) of the forearm. The TFCC is triangular in shape, and the central portion acts like a meniscus much like the meniscus in the knee. Injuries occur from ulnar overload, and the mechanism of injury can be acute (hitting the ball fat) or repetitive (improper swing mechanics). In our experience, the TFCC is a very common injury and can require surgical repair. Since this injury tends to lead to surgery – our goal is to prevent or correct the issue quickly. Poor use of the lower body is the primary swing mechanic that leads to this injury. This is more of a general statement, than a swing characteristic. Most players believe their wrist or hand pain is due to an upper body problem, but in our experience, it can usually be traced back to a lower body dysfunction. Anytime a player is not using their lower body effectively to initiate the downswing, the upper body is forced to overcompensate and becomes more active. This only puts more stress and strain on the structures of the upper extremities. This first step in diagnosing a wrist or hand problem is to evaluate how effectively the player uses their lower body. Here is a quick list of the most common examples of poor use of the lower body: Hanging Back - the first thing to look for is a normal initiation of the downswing with a shifting of weight from the trail side to the lead side. If this does not happen, most players are forced to throw the club excessively from the upper body instead.
The second step is to diagnose why we have a poor use of the lower body. We determine this by performing different movement screens designed to look at how the body moves. We typically find three areas that do not function properly. 1. Internal rotation of the lead hip is paramount for allowing the lower body to fully rotate without forward thrust toward the golf ball. If the pelvis is unable to rotate around the lead hip due to joint or muscular restrictions, then forward and lateral movements will dominate the pattern. 2. The ability to separate the upper body from the lower body allows the golfer to maintain stable posture and proper sequence of motion during the swing. Limited thorax-to-pelvis separation is usually caused by reduced spinal mobility and shortened lat flexibility. 3. Finally, the ability to stabilize your lower body is directly proportional to gluteal and abdominal strength. A stable neutral pelvic posture helps prevent the lower body from thrusting toward the golf ball during the swing. The third step is proper treatment. If you are having wrist pain and we find that there is nothing torn, the first thing we want to talk about is sleep. If you irritate your wrist for 8 hours a night, it does not matter what activities or treatments you are doing during the day - your wrist will not be able to fully heal. At night, it's best to look for if you sleep with your hands up by your head, or sleep with them in a flex or an extended position. These positions can lead to extra stress on the wrist. A good rule of thumb is to try to sleep with your arms down by your side or folded over your stomach.
If you are having wrist pain - do not play through the pain. Let’s get you in and assess your movement patterns. At KC Chiro, we work closely with golf teaching professionals to ensure that you can continue to play golf injury and pain free. |
KC Chiro BlogDiscover expert chiropractic tips and wellness insights on our blog. Stay aligned and healthy with guidance for the whole family Archives
June 2024
Categories |
 RSS Feed